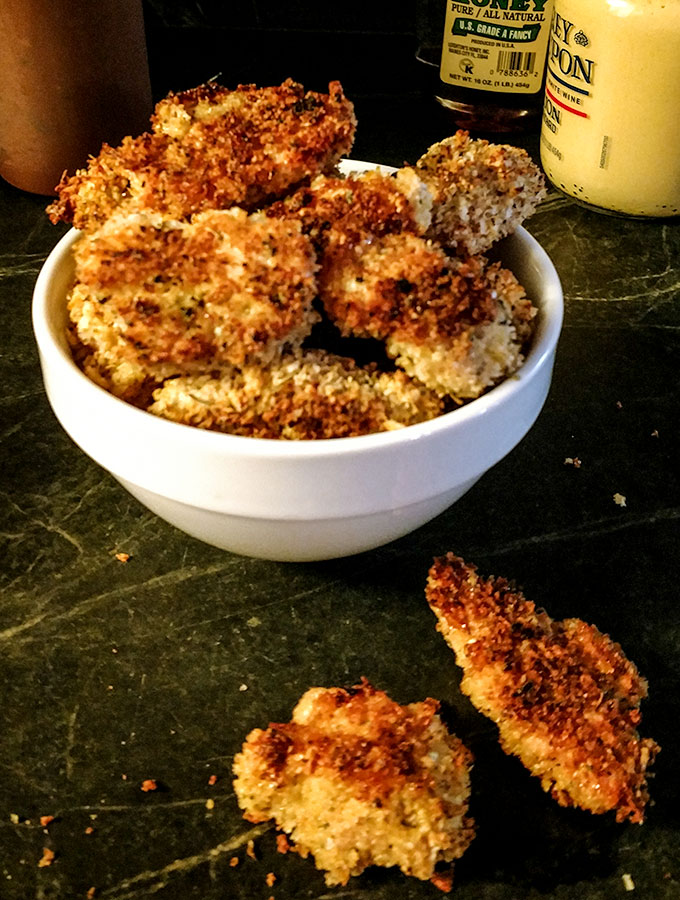
Chicken tenders, or chicken fingers, whatever you choose to call them, are a nutritious and easy on the go snack, lunch or meal. Our chicken tenders are made with real chicken and Parmesan cheese. Forget the sodium laden, mystery meat at drive throughs. On the Go Bites shows you how easy it is to make your own chicken fingers.
The Chicken Fingers of my youth were called Chicken Nuggets and they are still around today. Processed bits and pieces of who knows what part of the chicken are ground and formed into the chicken nugget shape. To be fair, the “Golden Arches” and frozen chicken nuggets from the grocery store have improved incredibly in the last few years. But wouldn’t you rather be in control of what part of the chicken is used, choose preservative free and antibiotic free meat and breading. I would. I believe you would too or you wouldn’t be reading this recipe right now.
The Chicken Tender recipe below shows you the easiest and most preferred method. But if you have kids and want to add a Wow factor then you might want to add a step. Time consuming, but a worthwhile step if it makes your child smile and beg for more of these nutritious Chicken Tenders. You can either buy ground chicken or grind the chicken yourself, I use an attachment on my Kitchen Aid Stand Mixer. And then form the ground chicken into fun shapes. You can make letters to spell out your child’s name, shape into geometric patterns or moon and stars, the simpler the shape the better. To keep the shape you may want to place the shaped chicken nuggets on a parchment lined baking sheet and freeze for a half hour or so, then go through the breading process. Whatever shape you choose, make sure that you gently flatten the chicken nuggets to the same thickness so that they will cook evenly. Then follow the remaining instructions in the recipe below by dipping in the flour, egg mixture and finally the breadcrumbs and then cooking. A great way to remember the order of breading is to think of the abbreviation for February, FEB (Flour, Egg, Breading).
The Chicken Tenders can be fried in a pan with olive oil or baked in the oven. Baking is faster, easier and lower in calories, but it’s hard to beat a quickly fried, golden, crunchy Chicken Tender.
Do you ever wonder why they are called “fingers”? After all, chickens don’t have fingers. It’s thought that the moniker came from the fact that the chicken tenders look similar to fingers and that we use our fingers to eat them……….thus Chicken Fingers. I like to use the term Chicken Tenders, it just sounds more natural.

Parmesan Chicken Tenders
Crispy Golden Chicken Tenders are the perfect grab and go meal
Ingredients
- 1 1/2 Pounds Skinless, Boneless Chicken Thighs or use chicken tenderloins or breast meat
- 3/4 Cup All-Purpose Flour
- 3 Large Eggs Beaten
- 1 Cup Panko Bread Crumbs See notes for homemade
- 1 Tablespoon Italian Seasoning Optional
- 2 Teaspoons Garlic Powder Optional
- 1/2 Teaspoon Kosher Salt
- 1/4 Teaspoon Black Pepper Freshly ground
- 1 Cup Parmesan Cheese Freshly grated
Instructions
Breading Chicken:
-
Using 3 shallow dishes, I like to use pie plates, place in a row. Fill the first pie plate with the flour. Fill the second with the eggs and lightly beat. In the third pie plate mix the Panko bread crumbs, seasonings and Parmesan cheese.
-
Cut the chicken into about 1" X 4" pieces, keeping the thickness as uniform as possible so that the chicken cooks evenly.
-
Dip both sides of the chicken pieces in the flour, shake off excess. Dip in beaten eggs. Finally roll in the Panko bread crumb mixture.
If Baking then:
-
Preheat oven to 425 degrees. Prepare baking sheet by lining with parchment paper or line with foil and brush with olive oil to keep the chicken tenders from sticking.
-
Place breaded chicken on the prepared pan about 1" apart. Drizzle with a little olive oil to help browning. Bake for 20-25 minutes until cooked through and golden.
If Frying then:
-
Fill medium size frying pan with 1/2" oil. I use light olive oil as opposed to extra virgin as it has a higher smoking point. You can also use canola or peanut oil. Heat over medium, after about 5 minutes test the temperature with a 1" piece of white, preferably stale, bread. If it browns in a minute then the oil is ready, adjust your temperature according to this bread test. Now place breaded chicken tenders in oil and fry for 5 minutes, turn over and fry for another 3 minutes or until chicken is cooked through and golden brown. do not crowd the pan or you will steam the chicken and it won't brown well.
-
All of the chicken will not fit in the pan at once. Once the first batch is fried and ready, place on a papertowel lined plate to drain the oil, or even better if you have a paper bag drain the chicken on that. Wait about a minute to allow the oil to return to it's beginning temperature. With a slotted spoon remove any left over crumbs in the oil to avoid the crumbs from burning and sticking to your next batch of tenders. Then fry your second batch and drain
Recipe Notes
Homemade bread crumbs: Tear bread into 2" - 3" pieces and place in food processor. If bread has a thick crust you will want to trim the crust before blending in the food processor. Pulse until you get large, uniform crumbs. Panko is meant to be larger than the really fine bread crumbs you find at the grocery store. Spread evenly on a baking sheet and bake at 250 degrees for 10-15 minutes or until dry. One sandwich slice is about 1/3 of a cup. I have bread crumbs on hand all of the time because I use up any leftover bread before it spoils. I put the bread crumbs in resealable plastic freezer bags, 2 Cups is a good amount for each bag, mark with the content and date frozen and freeze for up to 3 months. No need to defrost, just pull from the freezer and use for any recipe calling for bread crumbs.
Dipping Sauces: If you are running on the go then no sauce is needed. If you can take a sauce with you then a few good suggestions are honey mustard, marinara, BBQ, ranch dressing or Greek yogurt with basil.
Freezing Directions:
Save
Leave a Reply