Birthday breakfasts and dinners are a big deal in my household. Dinner ideas will vary but breakfast crepes are the unanimous request for all 3 boys birthdays as well as my husband.
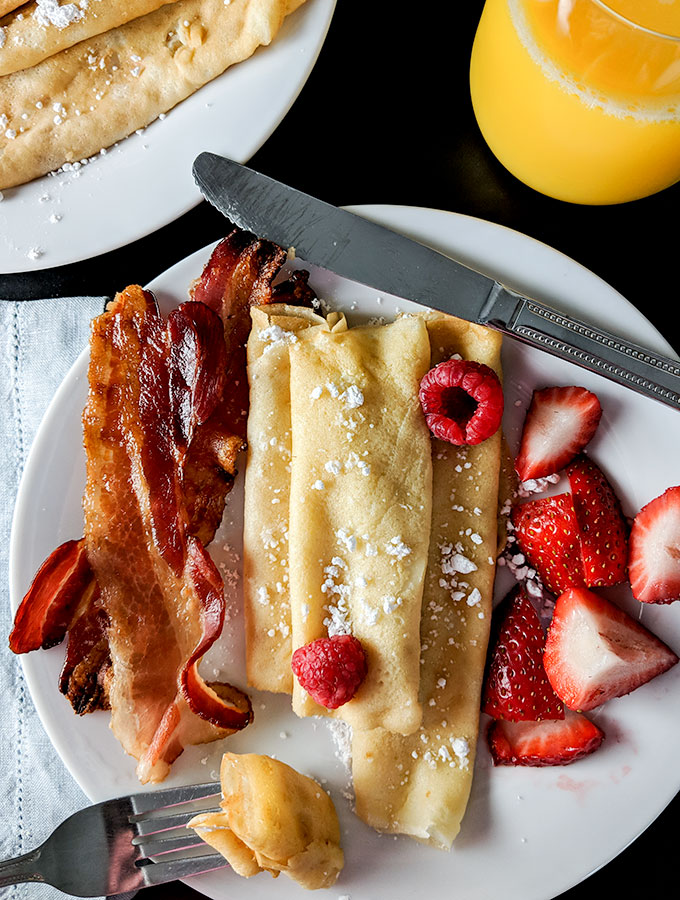
One way to present crepes is to roll them in a cylinder.
The thin, light pancakes practically melt in your mouth and can be filled with all kinds of crepe fillings, from sweet to savory. This breakfast crepe recipe is for sweet fillings.
What Is A Crepe?
Crepes are a staple recipe that every cook should know how to make. I’m surprised when we have guests over who have never eaten a crepe. I grew up with my mother making savory crepes with a mushroom cream filling for dinner. Yum! My mouth waters just thinking about it.
The best way to describe a crepe is as a very thin pancake. But it’s so much more than that. Breakfast crepes are a canvas for so many recipes, you can add any topping or filling that you would add to a pancake, but crepes aren’t nearly as filling.
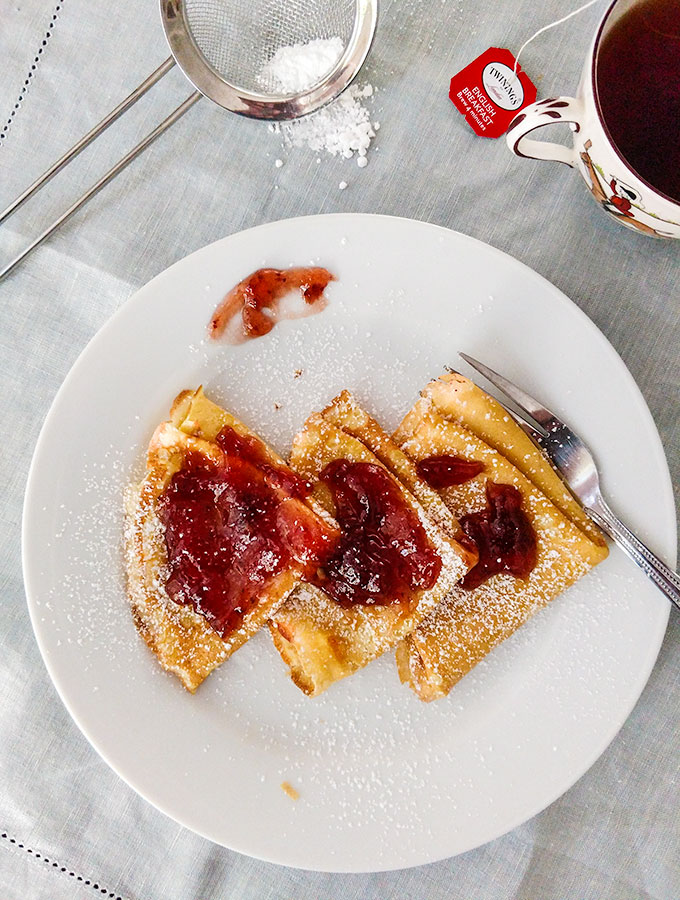
You can eat several crepes and not feel stuffed like you would with waffles or pancakes. This can be a good or bad thing. I can tell you that I have 3 very hungry boys and they prefer crepes over pancakes and waffles. The bad part of that is that breakfast crepes take some time to make. That’s why I usually make a double or triple batch and freeze some for a later day.
How To Make Breakfast Crepes
Crepes are easy to master but can be time consuming. I always have two or three pans going and typically will triple the recipe. Without two pans burning it would take forever to make them.
Get the pans warming over low to medium heat for about 5 minutes before starting your first crepe.
Melt the butter over low heat and then cool slightly, you don’t want to add hot butter to cold milk or the butter will coagulate and get lumpy.
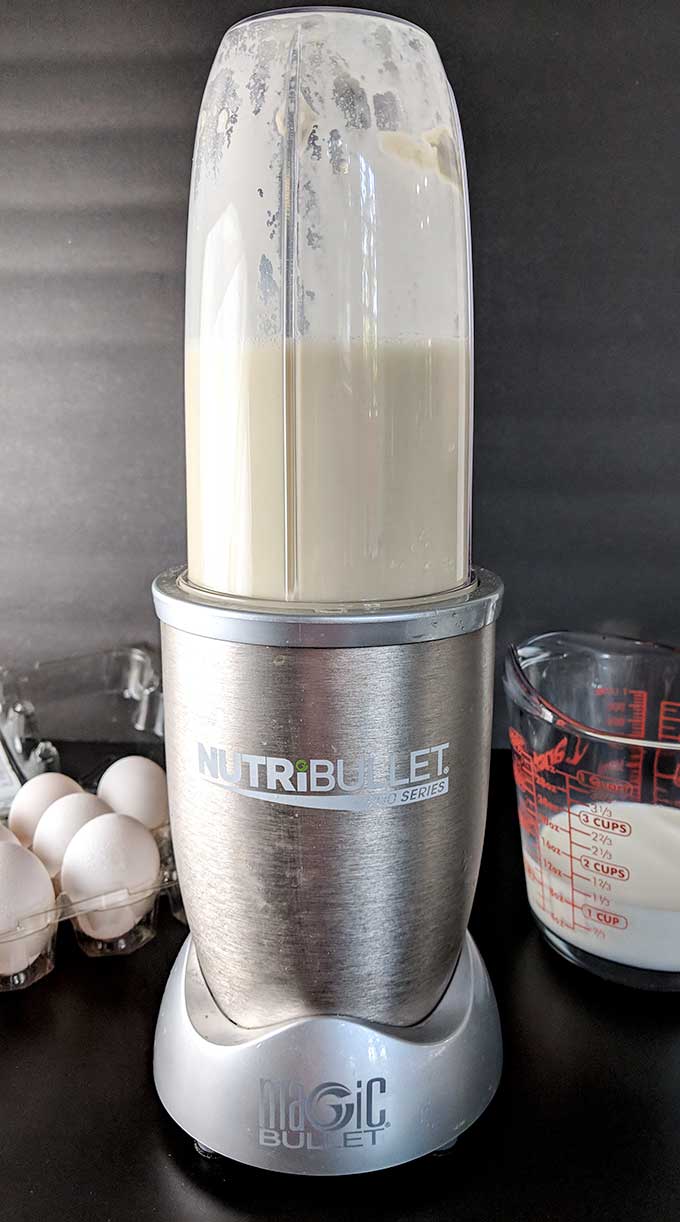
Make sure you check your blender instructions as to whether to add liquid first or last. With a Ninja or Nutribullet you add the dry ingredients first.
I like to use a blender for ease and speed. You can opt not to use a blender, but then it will take a little elbow grease with a whisk, the key is to have a lump free batter. Ideally you will rest the batter for about an hour or even up to two days especially if you use a blender. This will yield a better consistency in your breakfast crepes.
Full disclosure here, I rarely let the batter sit, I typically use it straight out of the blender and my breakfast crepes turn out just fine. If you are entering a competition, then let the batter sit overnight.
Warm the milk for 30-60 seconds in the microwave if it’s not already room temperature. Don’t boil the milk, the point here is to have room temperature to slightly warm milk.
Add all your ingredients to your blender according to the blender directions. I use a Nutribullet so the dry ingredients go in first and then the liquid. Traditional blenders usually go backwards with wet ingredients going first.
Blend for about a minute. If flour sticks to the side of the blender, stop, scrape down the flour and blend for an additional 30 seconds.
Do I Need A Special Pan For Breakfast Crepes?
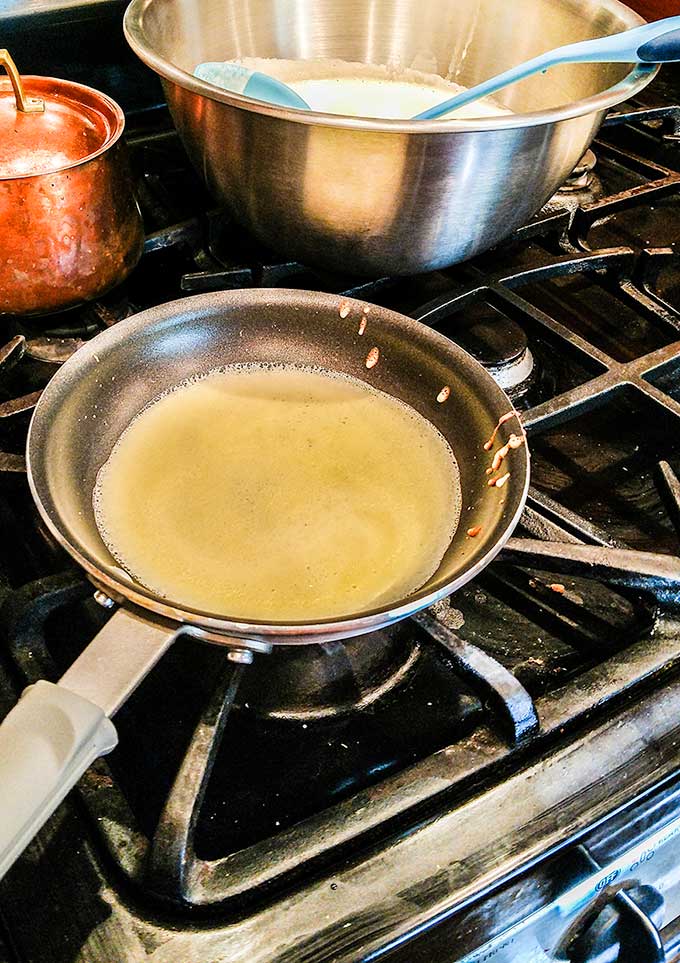
No. Does a special crepe pan exist? Yes. And it can be useful. But really, a good nonstick, low sided skillet, 8” to 10” diameter works great. It’s the same pan I use to make individual omelets, fried eggs or grilled cheese sandwiches. I use 8” diameter and always have two pans going at once to cut the cooking time in half. If I thought I could keep up with three pans I’d do that, sometimes I’m able to master it.
How To Swirl Breakfast Crepes In The Pan
Swirling the breakfast crepe in the pan is one of the tricks to making the perfect best crepe. Temperature of the pan is key.
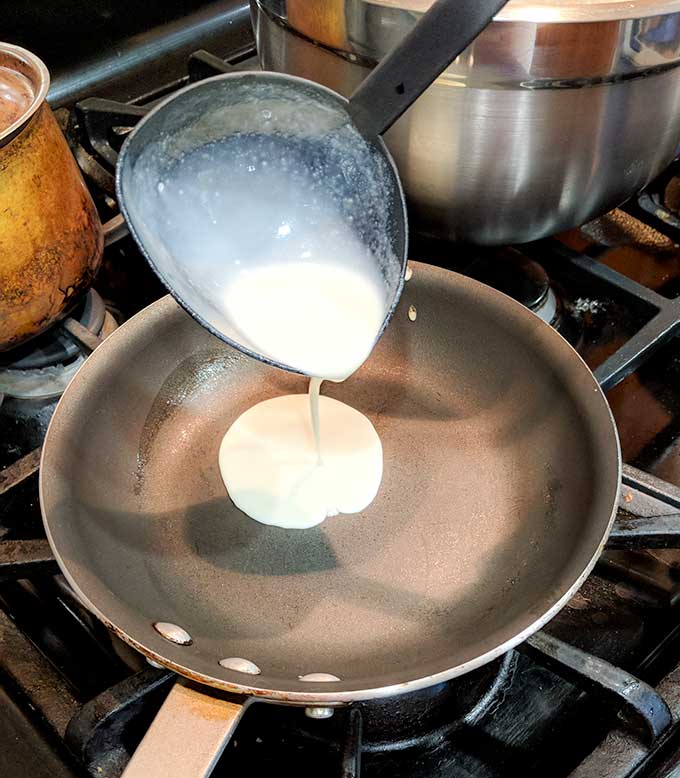
Warm the pan(s) over medium heat for about 5-10 minutes. Pour ¼ cup batter in the pan, immediately lift the pan and swirl to distribute the crepe batter evenly throughout, making sure that the edges are even. The batter tends to settle in the middle of the pan and the edges start to form bubbles. Keep swirling giving the edges an additional coating of batter from the center of the pan when swirling.
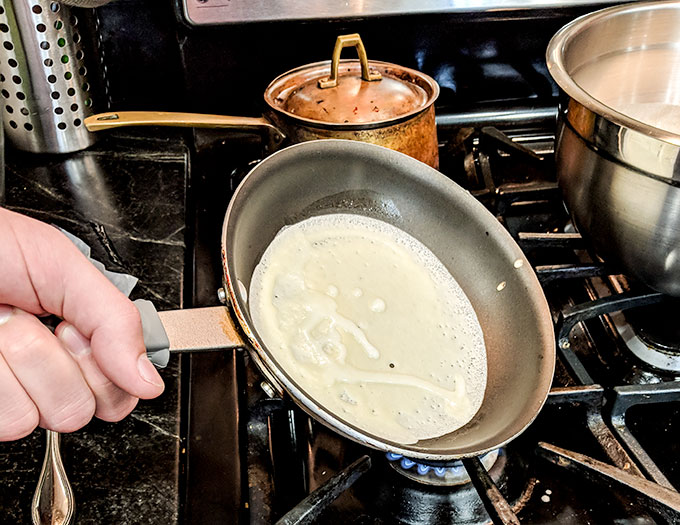
If batter pools in middle of pan, keep swirling to redistribute more to the outside edges where you see bubbles starting before putting the pan back on the stove.
Place pan back on heat for about 30-45 seconds. You’ll see the edges start to brown slightly and dry out, the middle of the crepe will look a little wet but be set. Run a rubber spatula around the perimeter edge between the crepe and the pan. Then use the spatula or your fingers to gently lift the edge of the crepe and flip.
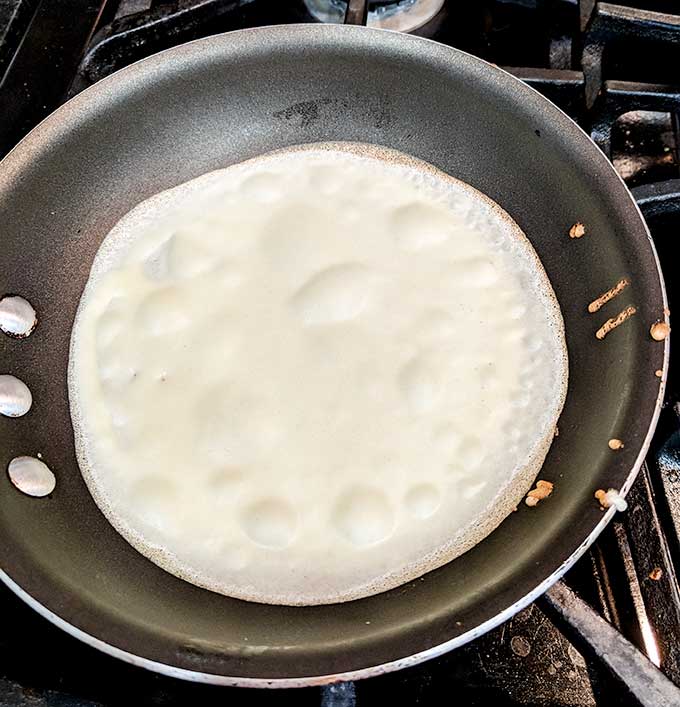
The batter has been swirled in the pan and back on the heat. Notice the edges have small bubbles and lightly brown, drying out. This is when you want to run a rubber spatula just under the edges, then pick up with fingers or small spatula and flip.
The second side of the crepe will only take about 30 seconds. You are not going to cook the crepes as brown as you would a perfect pancake. The second side will be mottled like the picture below, and the first side will have a more uniform golden appearance.
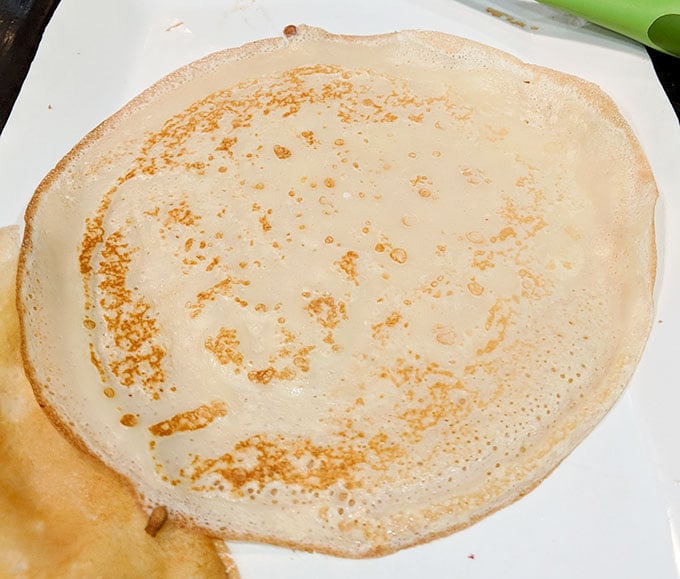
After flipping the crepe a second time you’ll see a mottled brown speckled appearance.
Crepes are meant to be just slightly golden, almost look undercooked, and not crispy.
Expect your first crepe, or first several crepes to tear, be too thick, over cooked, under cooked, etc. No Fear! Even after cooking crepes for decades I still have my first breakfast crepe or two not turn out right.
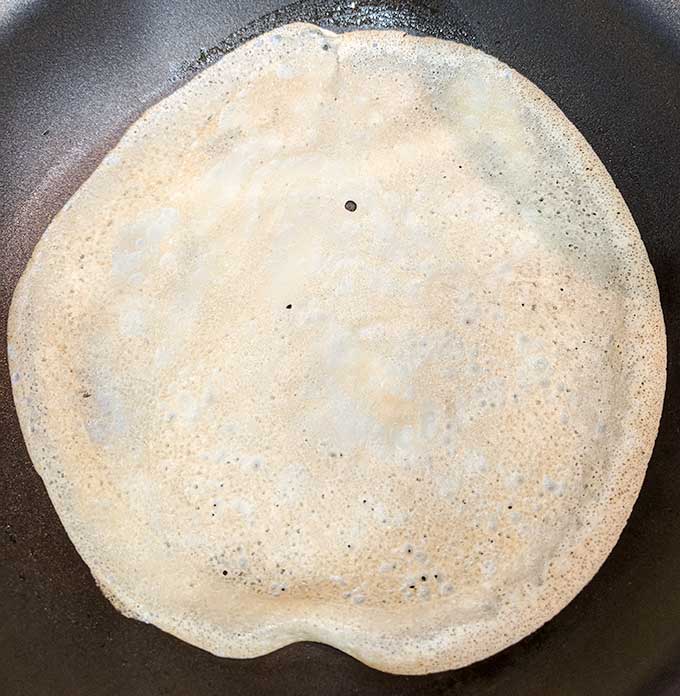
Notice after flipping the pancake once you want just a slightly golden color, not a dark brown like you see in a pancake.
That’s fine, I eat the remnants while cooking the rest of the batch. The reason being is that each pan reacts differently. You need to figure out what’s the right amount of batter so that the crepes aren’t too thick. ¼ cup measuring spoon works well for me, sometimes just a bit less that ¼ cup.
Then the temperature must be perfect. All our stoves differ so it’s hard to tell you exactly what temperature to set. On my stove about medium works well. The crepe should take about a minute on the first side and 30 seconds on the second side. If you differ in time greatly then adjust your heat.
Should Breakfast Crepe Batter Be This Thin?
Yes, breakfast crepe batter is extremely thin, nothing like a pancake or waffle batter, more like a liquid.
Should I Add Butter To The Crepe Pan Every Time?
No, it’s not necessary unless you are trying to add more butter flavor. We’ve already added a good deal of melted butter to the batter, it’s just not necessary to add any more butter.
I do add a small pat of butter to the pan for the first crepe, after that I just keep pulling one breakfast crepe out of the pan and pour more batter right in for the next breakfast crepe.
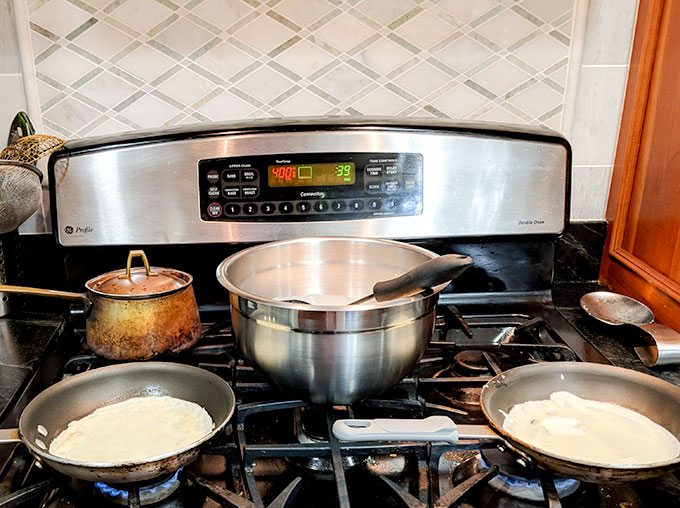
Huge time saver is to have 2 or 3 pans going at once. Keep the batter bowl between pans and just keep cooking away.
You may find after cooking several crepes that they start to stick, if so then add another pat of butter and you should be good to go for several more crepes to come.
Breakfast Crepes Make Great Finger Food For On The Go Breakfast
Talk about a gourmet on the go breakfast, crepes fit the bill. I’m not saying that I make crepes on week days because I don’t. When I make crepes its on a weekend morning when I know I have plenty of time. I flip on my Spotify playlist or watch a movie or cooking show and cook away.
Breakfast crepes are ideal for freezing or keeping in the refrigerator for a few days and up to a week depending on the filling.
So, if we are lucky enough to have any leftover breakfast crepes from the weekend, then I put them in a container in the refrigerator and let everyone grab one, two or ten as they head out the door.
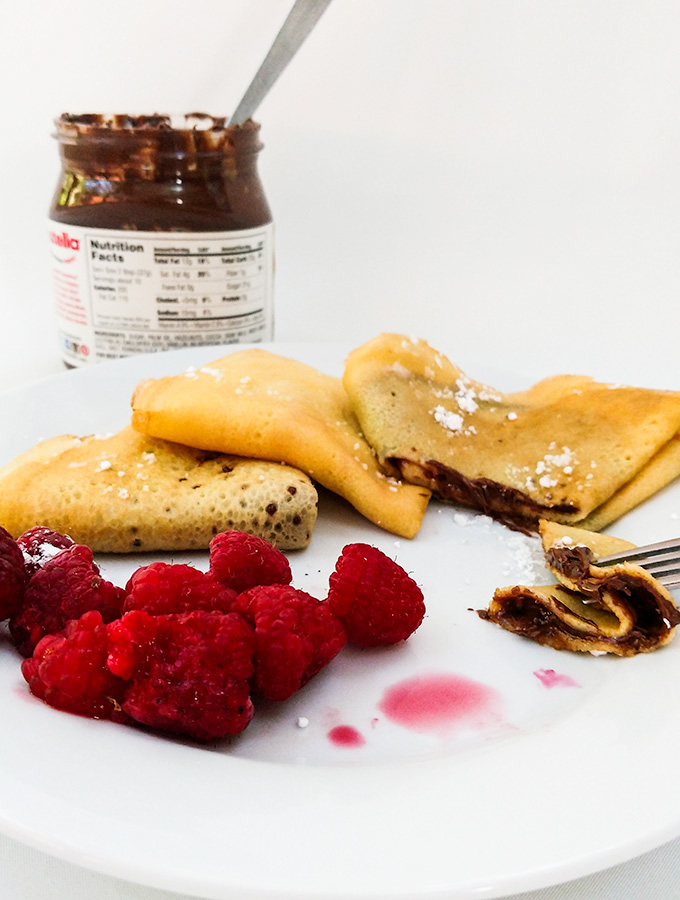
Folding crepes in half and then in half again to make a quarter circle shape holds the filling in well.
I found that folding the crepes in ¼ circles tends to be less messy to eat on the go as opposed to the rolled crepes. And don’t over do the filling either. People don’t want Nutella, jam or cheese to be spilling out onto their shirts on the way to work or school.
Crepes aren’t just for breakfast either. They make great after school, work or backpack snacks.
Breakfast Crepe Filling Ideas
I don’t even know where to start here there are sooooo many options. But here are a few of my favorite breakfast crepe fillings:
-Any fresh fruit. I especially like strawberries, blueberries, peaches or raspberries
-Of course, you have to sprinkle some powdered sugar on top
-I never add syrup but my boys often will add maple syrup or a blend of syrup with agave
-Nutella with or without bananas
-Your favorite jam or jelly, strawberry and fig jam are my favorite
-Flavored yogurt
-Fried bananas in butter
-Lemon curd
-Black Forest or Tavern ham with Brie
-Ricotta cheese with strawberry jam
-And of course, a dollop of whipped cream adds to the festiveness
Substitutes For Breakfast Crepe Recipe Ingredients
-Add liquor if you’d like to have an added dimension. Good choices are brandy, Grand Mariner, Cointreau, or rum. Add ½ cup liquor and reduce the milk by that much as well.
-All purpose flour. I haven’t tried it yet but you could try buckwheat flour or gluten free flour and see how it goes. I’ll try that later and let you know how it works. Or if you try it please comment below and let me know how it worked.
Time Savers For Breakfast Crepes
You can make the batter up to two days in advance and store in the refrigerator covered with plastic wrap. Remove the batter from the refrigerator 30 minutes before cooking. You may have to add a little more milk to thin out.
Freeze crepes for eating later. I like to either roll the crepes or fold them in quarter circles first so that the crepes don’t stick to each other as much. Flash freeze in a single layer for an hour or two. Then label and freeze in a resealable plastic freezer bag.
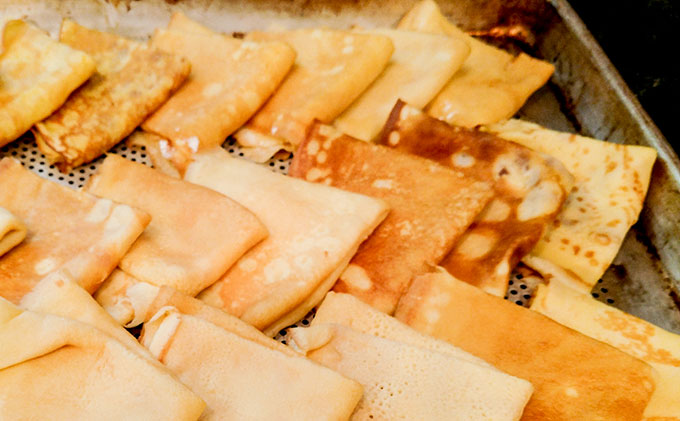
When flash freezing crepes I like to fold them into quarter circles or roll them. That way the crepes are easy to separate than if you just layered them pancake style.
Cooked breakfast crepes can be stored in the refrigerator for up to 5-7 days or frozen for up to 3 months. They actually can be frozen longer but might lose some texture qualities and be a little crunchy at the edges.
Defrost crepes in the refrigerator over night or microwave straight from the freezer. If the breakfast crepes are filled be careful of extremely hot filling from the microwave.

Breakfast Crepes With Crepe Filling Ideas
Breakfast crepes are so versatile. They can be an elegant breakfast or an on-the-go breakfast. Easy to master, time consuming to make, great for the freezer so you can just pop in the microwave and go.
Ingredients
- 4 Tablespoons Unsalted butter melted and cooled
- 1 1/2 Cups Milk room temperature or slightly warm
- 3 Large Eggs
- 1 Cup All purpose flour
- 3 Tablespoons Sugar
- 1/2 teaspoon Table salt
- 1 teaspoon Vanilla extract
- 1/4 Cup Powdered sugar for topping
Instructions
-
Get the pans warming over medium heat for about 5 minutes before starting your first crepe.
-
Melt the butter in a small saucepan over low heat and then cool slightly, you don’t want to add hot butter to cold milk or the butter will coagulate and get lumpy.
Fill a large measuring cup with milk and warm the milk for 30-60 seconds in the microwave if it’s not already room temperature. Don’t boil the milk, the point here is to have room temperature to slightly warm milk.
-
Add all of your ingredients to your blender according to the blender directions. I use a Ninja so the dry ingredients go in first and then liquid. Traditional blenders usually go backwards with wet ingredients going first.
Blend for about a minute. If flour sticks to the side of the blender, stop, scrape down the flour and blend for an additional 30 seconds.
Use right away or refrigerate batter for up to 2 days. The longer the batter sits the more consistent the crepes will be.
-
Test your pans with a ¼ cup batter. Lift the pan and swirl the batter several times to evenly distribute around the pan, don’t let all of the batter concentrate in the middle of the pan. Place back on burner.
When you see the edges starting to turn very light brown and drying at the edges, use a rubber spatula to run around the edges of the crepe. Then lift the crepe with your fingers and flip.
Cook second side for about 30 seconds then remove to plate. First side will be speckled with brown spots, second side will have a very light golden color.
-
Fold the crepes in half and then in half again for a quarter circle shape. Or roll into a cylinder. If adding filling, place filling on half the crepe before folding or rolling.
Add toppings. The simplest topping is some berries and powdered sugar. Yum!
Recipe Notes
Time Savers: Crepes are easy to master but can be time consuming. I always have two or three pans going and typically will triple the recipe. Without two pans burning it would take forever to make them.
-I like to use a blender for ease and speed. You can opt not to use a blender, but then it will take a little elbow grease with a whisk, the key is to have a lump free batter. Ideally you will rest the batter for about an hour or even up to two days especially if you use a blender. This will yield a better consistency in your breakfast crepes, but the rest is not mandatory.
Full disclosure here, I rarely let the batter sit, I typically use it straight out of the blender and my breakfast crepes turn out just fine. If you are entering a competition, then let the batter sit overnight.
Tips: When cooking the crepes you should be able to flip the crepe after a minute on the first side and on the second side after 30 seconds. If the crepe isn’t cooking quickly and tears then turn up the heat.
If it’s getting crispy on the edges or too dark brown on the first side then turn down the heat.
If the breakfast crepes are doughy you need to decrease the amount of batter or swirl more so that the batter is more evenly distributed.
DON’T WORRY! You need to cook crepes several times until you get the hang of the amount of batter and the perfect temperature for your pan. Once you get that down you’ll be cooking crepes all the time. They are well worth it.
WE LOVE FEEDBACK FROM OUR LOYAL READERS!
Did you like the Breakfast Crepe Recipe? Did you make any changes? Please leave a comment and star rating letting us know how you liked it and/or any comments to help improve the post for other readers. Please be kind….we try our best!
Keep up to date on our new recipes and “how to techniques” by signing up for our weekly newsletter and by following us on Pinterest, Instagram or Facebook. Thanks for your feedback.
Thanks for visiting us!
Great instructions, easy to follow and now….. I’m a crepe-a-holic. Started with simple ham and cheese….. now I’m thinking of Banana Fosters Crepes. Wife wants raspberry, may do both. Thanks for the info.
So glad you love them Ian. My whole family are crepe-a-holics!
GLuten free and buckwheat flour work fine. Yummy!